A Guide To Printing Your First Portfolio Book
July 30, 2016As your career as a photographer advances you’ll find yourself in new situations. As a photographer, you’ll start to book bigger and better jobs and you will be asked to meetings where you can pitch yourself as the photographer. These days, most photographers have a website and believe it will suffice as their main platform for showing their work - but what often goes under the radar is their printed portfolio book. These books are great to take into meetings with new potential clients as it’s a way to display photographers to show their images more intimately. But how do you choose which images to put into your book?
Your portfolio book should contain 20-30 images with only 40% of them from website because chances are the client as already viewed your page. The other 60% should be for images that they might not have seen before to give them something new to look at. This book needs to tell the client who you are as a photographer and give them insight into your personality. They’ll likely look at multiple photographers for the job and you need to make sure that your book has something different from the others. It’s great to print a few commercial images that show you can handle a shiny, commercial job, but this doesn’t mean you need to fill the whole book with it. It’s great to include portraits, landscapes and even a still life so that your client can understand your photographic perspective and they might find something relatable in this personal work.
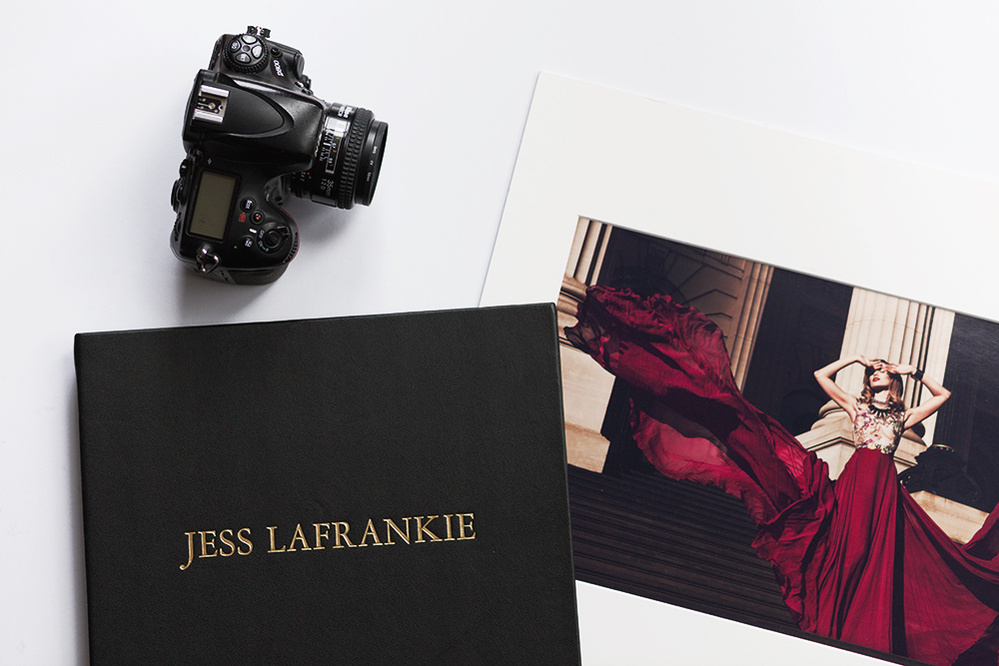
Your book should look as professional as possible which means it becomes an expensive investment, especially if you update book every 6 months to keep it fresh and current. It’s important to get the right book cover that goes with your personal branding - my book is black leather with gold letters embossed onto the cover, this matches my website and gives a well rounded look for how I display my photography. Try investing in a quality cover so you don’t have to purchase another (at least for a few years), and only have to print new images to insert in.
You can choose between having plastic inserts or printing on double sided paper and having those screwed into the cover. I opted for double sided printing which has both upsides and downsides to it. The upsides are that you don’t have a layer of plastic in front of your images so it’s easy to view under any light (this was my main reason as I hate struggling to view portfolio books with too much reflection over the pages). Printing double sided also means that you get to choose a thicker paper if that suits your images (my clients always comment on how nice the pages feel). The downsides can be that their is no protection for your pictures. With people constantly flicking through the book it means that there can be finger prints left or scratches made on the paper so you always have to handle your book delicately. The second downside is that I’m unable to shuffle around the images depending on which client I’m meeting with. I can print a new set of 30 images and screw them in every 6 months but I can’t take 1 out or re-order which can prove to be limiting.
Test printing is something that you can’t really escape from, trust me I’ve tried. Make sure you’ve talked to your printer and that he knows what you want from the images. Always print the test prints smaller so you’re not shelling out big bucks for proofing mistakes or tones. 11 x 14 inches is the standard size for industry books, so I’ll do A5 prints to proof the paper, colour mode and for any adjustments I’ll need to make as the retina screen and the printed page never see the same thing.
Handy tip: buy a pair of white cotton gloves to use when your looking at your prints, scratches can be made so easily so try to protect your images as much as you can.
If you have any questions please leave a comment below!